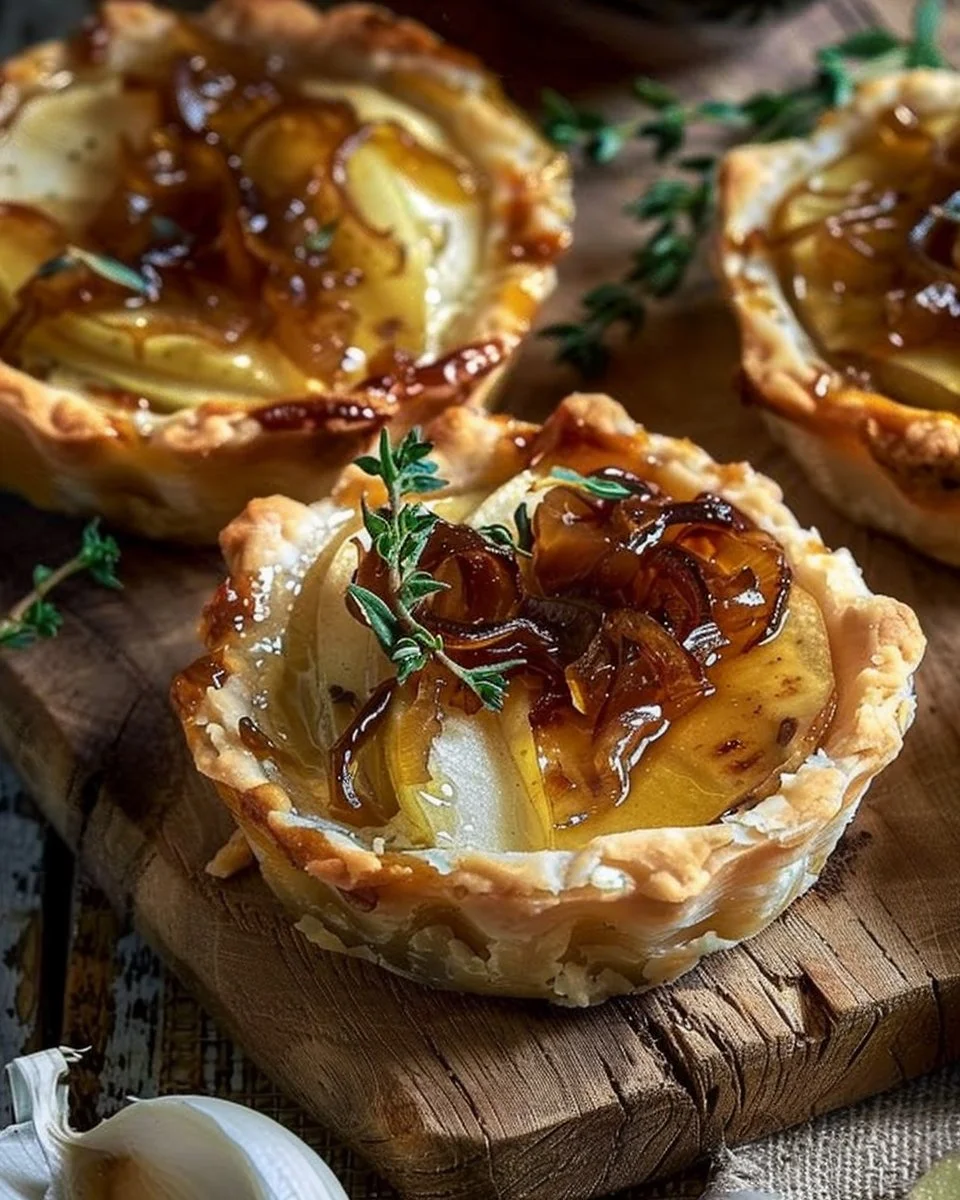
There’s something undeniably magical about the combination of sweet apples, creamy brie cheese, and the deep, rich flavor of caramelized onions. I discovered this perfect harmony while experimenting in my kitchen one rainy afternoon, seeking a comforting yet sophisticated dish. These Gluten-Free Apple Brie Tarts with Caramelized Onions & Honey are not just a treat for those with dietary restrictions; they are a delightful indulgence for everyone. Whether it’s for a cozy family brunch, a comforting weeknight dinner, or a showstopper at your next gathering, these tarts are sure to impress.
Why you’ll love this dish
These tarts exemplify everything we love about cooking at home. First off, they are effortless to put together, thanks to their simple ingredients and straightforward methods. The gluten-free crust is buttery and flaky—an achievement that often seems elusive in gluten-free baking. Trust me; the applause you’ll receive from family and friends will be worth the effort!
Furthermore, there’s an inviting warmth to serving these tarts fresh from the oven, the aroma wrapping itself around you like a fuzzy blanket. The sweet-tart apples beautifully contrast with the decadent brie and the earthy caramelized onions, all finished with a drizzle of honey that brings a touch of elegance. They are perfect for holiday gatherings, and I’m frequently asked for the recipe when I serve them at my home.
"These tarts are a slice of heaven! The flavors are so well balanced, and everyone always asks for seconds!"
The cooking process explained
Making these tarts involves a few key steps, but don’t worry—each part is simple and enjoyable. You’ll start with creating a gluten-free crust that’s easy to work with and flakey. From there, you’ll caramelize onions until they are sweet and deeply brown, then assemble everything in tart pans, which results in individual, charming servings. Lastly, they’ll bake to golden perfection, filling your kitchen with comforting scents.
What you’ll need
Gathering your ingredients is half the fun. Here’s what you’ll need to create these delightful tarts:
Gluten-Free Crust:
- 1 ¼ cups gluten-free 1:1 all-purpose flour
- ½ teaspoon salt
- ½ cup cold unsalted butter, cut into small cubes
- 3–4 tablespoons ice-cold water
- 1 large egg
- 1 tablespoon water
Apple & Brie Filling:
- 3 tablespoons butter
- 1 small yellow onion, thinly sliced
- 2 teaspoons sugar
- Pinch of salt
- ¼ cup low-sodium vegetable or chicken broth
- 2 medium sweet apples, peeled, cored, and sliced ¼-inch thick
- 4 ounces brie cheese, rind removed and sliced
- ½ cup grated Parmesan cheese
- Fresh thyme leaves (for garnish)
- Flaky sea salt (to finish)
- Freshly ground black pepper (to finish)
- 3 tablespoons honey
Substitution note: You can use alternative cheeses if you prefer, but brie adds that rich creaminess the dish needs to shine.
Directions to follow
In a mixing bowl, combine the gluten-free flour and salt. Add the cold butter, working it into the flour with a pastry cutter or your fingers until it resembles coarse crumbs.
Gradually add ice-cold water, mixing gently until the dough holds together. Divide into two portions, flatten into discs, wrap, and refrigerate for at least one hour.
Next, melt the butter in a skillet over medium heat. Add the sliced onions and cook until softened—about 5 minutes. Sprinkle with sugar and a pinch of salt.
Pour in the broth, scraping the bottom of the pan to pick up any bits. Lower the heat to medium-low and cook, stirring occasionally until the onions are deeply golden and caramelized, around 25–30 minutes. Set aside.
Preheat your oven to 400°F and line two baking sheets with parchment paper.
Roll out the chilled dough on a lightly floured surface to about ⅛-inch thickness. Cut into 4-inch rounds, pressing them into small tart pans. Prick the bottoms with a fork and chill for 20 minutes.
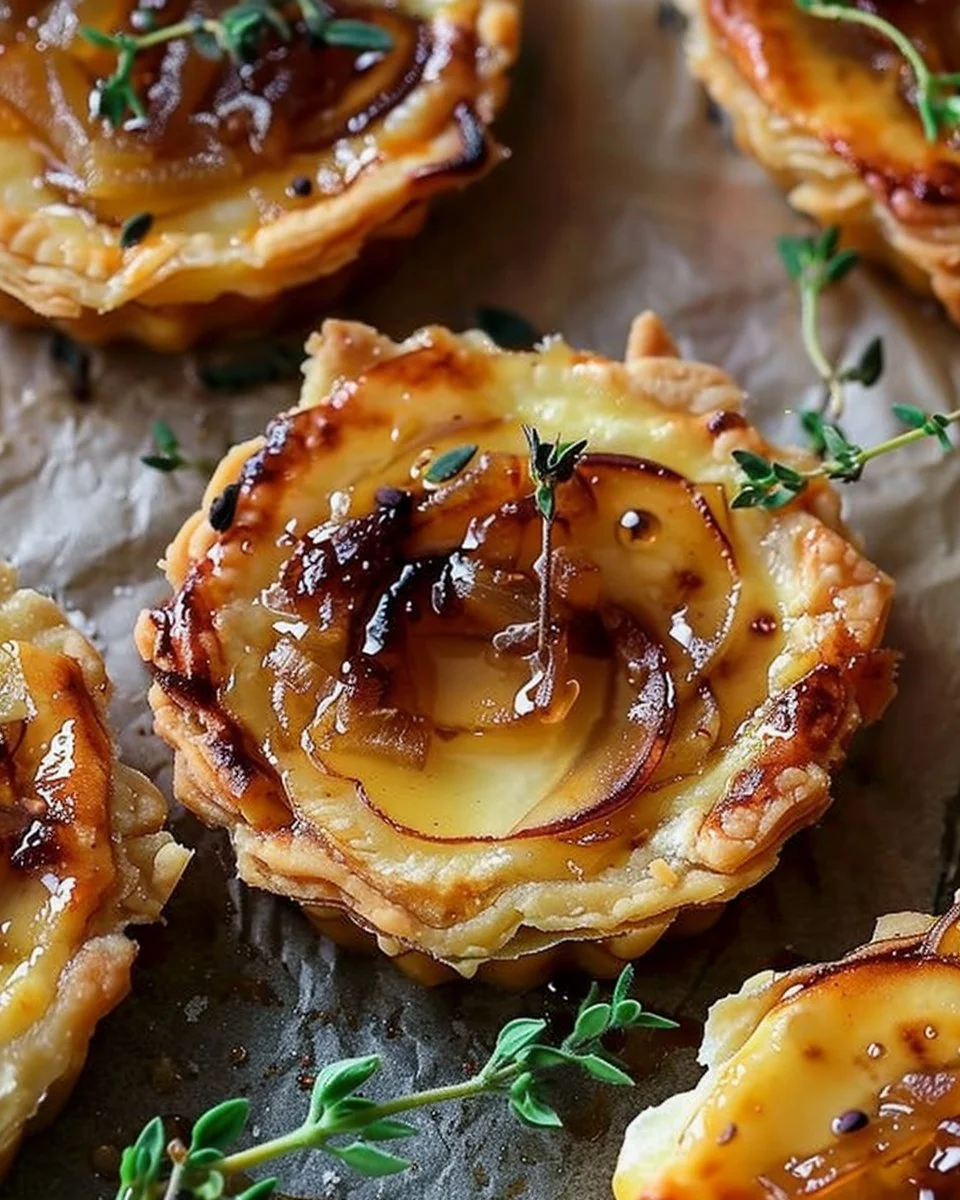
Whisk the egg with 1 tablespoon water and brush the chilled crusts lightly. Spoon caramelized onions evenly into each tart shell. Arrange apple slices and brie on top, then sprinkle with Parmesan cheese.
Bake for 20–25 minutes, or until the crusts are golden and the cheese is bubbly and lightly browned.
Allow the tarts to cool slightly. Top with fresh thyme, flaky sea salt, black pepper, and a light drizzle of honey. Serve warm, and savor the moment!
Best ways to enjoy it
When it comes to serving these tarts, the options are delightful! They shine on their own as a light lunch or appetizer. Pair them with a simple mixed greens salad dressed with a light vinaigrette, and you’ve got a satisfying meal. You might even consider serving them alongside some roasted vegetables for a more robust dinner.
For a cozy gathering, I love placing them on a wooden board, garnished with fresh thyme and maybe a few edible flowers. It’s a lovely, rustic presentation that invites everyone to dig in.
How to store & freeze
To keep your tarts fresh, store them in an airtight container in the refrigerator for up to three days. If you have leftovers (which is rare!), they can also be frozen—just ensure they are well wrapped. When you’re ready to enjoy them again, thaw in the fridge overnight, and reheat in the oven to maintain that delightful crispiness.
Helpful cooking tips
- Chilling is key: Give your dough enough time to chill. This allows the butter to solidify, which helps create that flaky texture you crave.
- Caramelize low and slow: Patience is essential for perfectly caramelized onions. Don’t rush this step; it’s worth it for the depth of flavor.
- Get creative with fillings: Don’t hesitate to swap out brie for goat cheese or your favorite variety. Each will impart a unique taste and character.
Creative twists
Feel free to get imaginative with variations! Consider adding some chopped nuts for a lovely crunch or incorporating dried cranberries for a sweet-tart balance. Different herbs can also change the entire dish’s profile; rosemary or sage would be a beautiful addition.
Your questions answered
How long does it take to prepare?
The total time for making these tarts is roughly 1 hour and 30 minutes, including prep and baking time.
Can I substitute the cheese?
Absolutely! Experiment with other cheeses, keeping in mind the flavor profiles you enjoy most.
Can I make these tarts ahead of time?
Yes! You can prepare the crust and filling a day in advance. Assemble and bake them right before serving for that fresh taste.
How do I store leftovers?
Keep leftovers in an airtight container in the fridge for up to three days. They can be reheated in the oven for best results.
Are these tarts suitable for freezing?
Yes, you can freeze them once they’re fully baked. Just ensure you store them in a freezer-safe container or wrap them well.